
How to Wrap a Gift Perfectly: Step-by-Step Holiday Guide | Craftihouse
How to Wrap a Gift Perfectly: Step-by-Step Holiday Guide
You may think that picking out the perfect retirement or holiday gift is the hardest part of the season. That is, until you get out all your wrapping paper and ribbon and then remember you don't know how to wrap a gift — properly, at least.
To avoid the process, some resort to gift bags or mason jars. Although these are tried-and-true ways to make your presents look pretty, learning how to wrap a gift is easier than you actually thought.

What You Need
- Wrapping paper
- Scissors
- Tape
- Ribbon
Steps
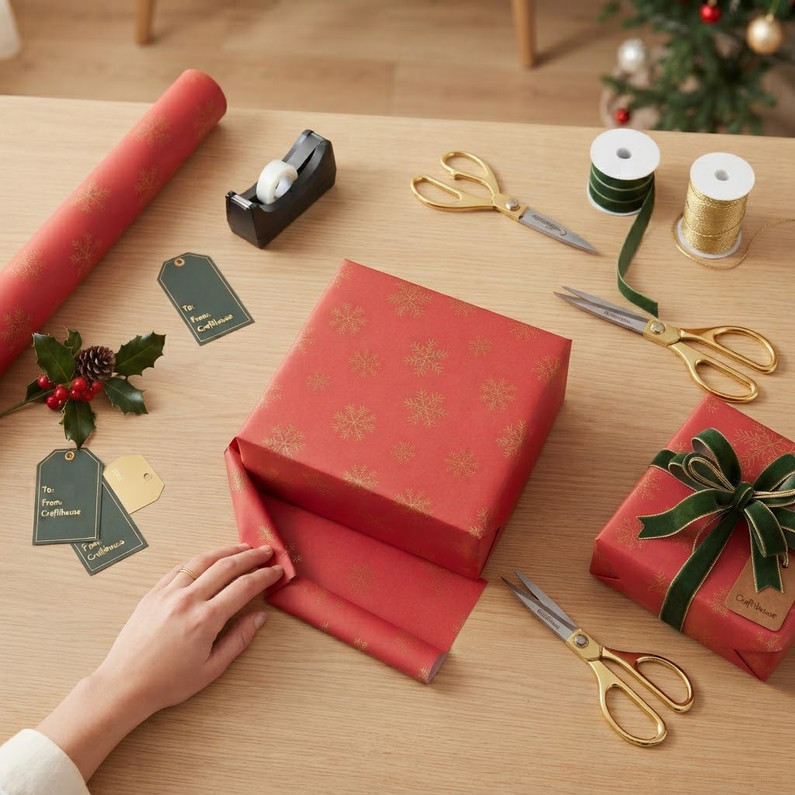
Assemble your present, the wrapping paper, scissors, and tape, and then clear a large, flat surface, such as a kitchen table.
Make sure that anything fragile within your box is wrapped securely and won't move around or become damaged. We recommend using tissue paper as padding.
Tip: Use a small piece of tape to keep the box closed.
Roll out your wrapping paper — but don't cut it yet. Place the box or gift in the center of the unfurled paper, upside down, so the seams of the paper will end up on the bottom of the package. Bring the paper up one side and over the top of the box, all the way to the opposite edge. Estimate how much additional wrapping paper you'll need to cover the side of the box that's not yet covered, then cut the paper. Strive for long, even cuts; if your edge is jagged, fold it under for a smooth seam.
Center the box on the paper. Bring one side of the paper up the side and halfway across the top, affixing it to the box with a piece of tape. With some practice, you may be able to skip this step.
Before bringing the second side of paper up and over the first, create a clean seam by folding over the last half-inch or so of the paper, using your fingers to create a tight crease. Now bring this side up so it just overlaps the first one and affix with tape.
Tip: Double-sided tape can be used for a cleaner look.
Starting on one end, fold down the top flap onto the side of the box, creating two little wings at the side. Flatten those in against the box, then fold the remaining triangle of paper up against the box. Fasten it in place with tape.
Set your box on end, with the side you just worked on facing down, and repeat step 6 on the opposite end.
Add any ribbon, gift tags, or decorative bows to your gift. You've just wrapped a present perfectly.

"Mastering the art of gift wrapping elevates your presentation, turning any retirement or holiday present into a work of art."
Skip the Paper — Elevate Your Presentation Instead
If you'd rather skip folding paper altogether, our premium gift boxes come ready with matching ribbon for an instantly polished look, or go further with a handmade inlaid wooden gift box — a reusable keepsake that becomes part of the present itself. Pair your beautifully wrapped presents with exquisite handmade artisanal goods and unique gifts online at Craftihouse.
Recent Posts
-
Retirement Gift Ideas in Dubai | Craftihouse
Retirement Gift Ideas in Dubai If you're looking for a retirement gift in Dubai, there are plenty of …25th Sep 2026 -

Custom Portrait Painting in Dubai — The Ultimate Handmade Gift for 2026 | Craftihouse
Custom Portrait Painting in Dubai — The Ultimate Handmade Gift for 2026 A photograph captures a mome …6th May 2026 -
Custom Arabic Calligraphy Name Art on Paper — The Timeless Handmade Gift in Dubai 2026
Custom Arabic Calligraphy Name Art on Paper — The Timeless Handmade Gift in Dubai 2026 In an era of …6th May 2026